Blog

  • How We Pulled Off a Surprise Party for my Mother-in-Law

    How We Pulled Off a Surprise Party for my Mother-in-Law


    Some of the links in this post are affiliate links, which means I may earn a small commission at no extra cost to you. As an Amazon Associate, I earn from qualifying purchases.

    About a month and a half before the party, I found myself quietly planning a surprise retirement/birthday party for my mother-in-law.

    Planning a Surprise Retirement Party at Home

    It all started when she set her final work date. Once that was on the calendar, the idea sparked. Small at first, just a flicker… I kept thinking about everything that would go into planning a surprise party. Honestly, it felt a little overwhelming. I’m an introvert and a perfectionist, which is a dangerous combination when you’re hosting people.

    But then my brother-in-law volunteered to handle all the communication and just like that, the spark turned into a full-blown flame. With help from my husband, my parents, and my brother-in-law, the plan finally felt doable.

    Hosting tip: Letting someone else own a piece of the plan, especially communication, can instantly reduce stress and keep things organized without you juggling every detail.

    Choosing a Party Theme That Felt Elevated but Easy

    The first thing I did was design a simple invitation, clearly stating the element of surprise. I wanted everyone to be on the same page from the beginning.

    Then I turned to Pinterest for inspiration. I searched “retirement party ideas,” but nothing quite fit. Everything felt either too formal or too goofy. What I really wanted was something laid-back and casual, but still elevated and elegant.

    Once I shifted my search to “elegant party vibes,” I finally found inspiration that felt right.

    A quick trip to Michael’s followed, where I picked up balloons, ribbon, and cocktail napkins. I planned to grab dinnerware and glass vases too, but their selection was pretty lackluster, so I pivoted.

    Keeping the Menu Simple With a Make-Ahead Meal

    About two weeks before the party, we went ahead and bought all the ingredients for chili. Chili felt like the perfect choice: warm, comforting, easy to eat while standing and chatting, and still hearty enough to feel like a real meal.

    Hosting tip: One hearty, make-ahead main dish keeps the menu simple and frees you up to actually enjoy your guests.

    Buying everything early also gave me peace of mind, especially since it was the weekend after New Year’s and grocery stores can be unpredictable after the holidays. At the very least, I knew we could feed everyone.

    Hosting tip: Shopping ahead isn’t about being rigid; it’s about removing last-minute stress so you can focus on the fun parts later.

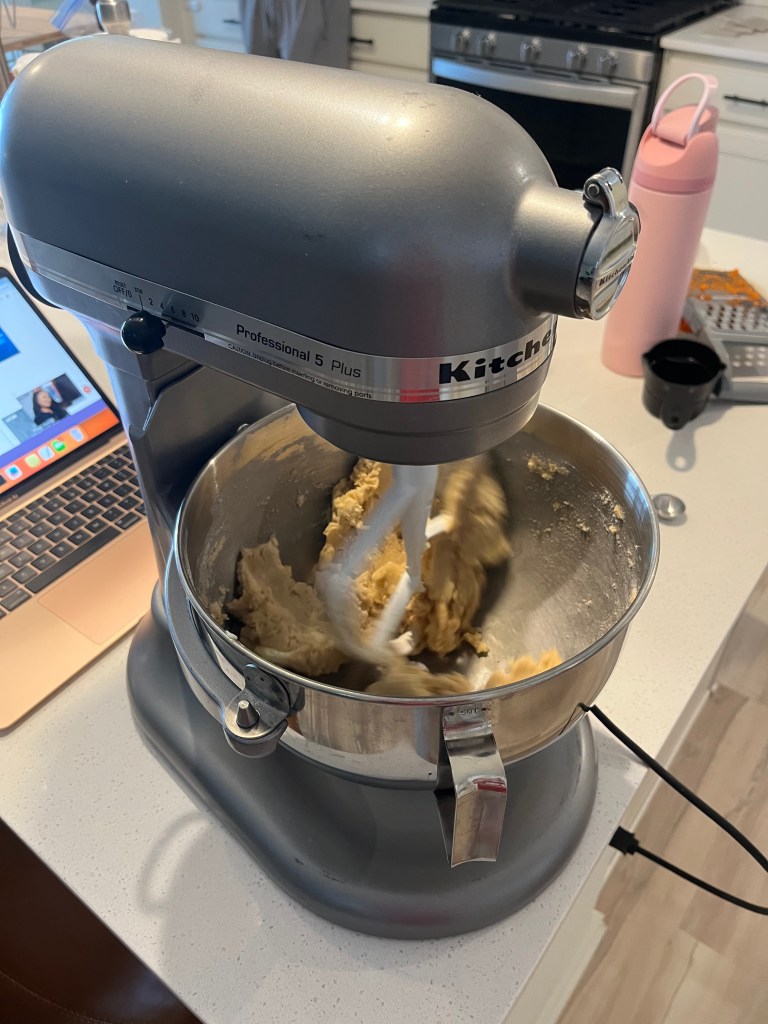
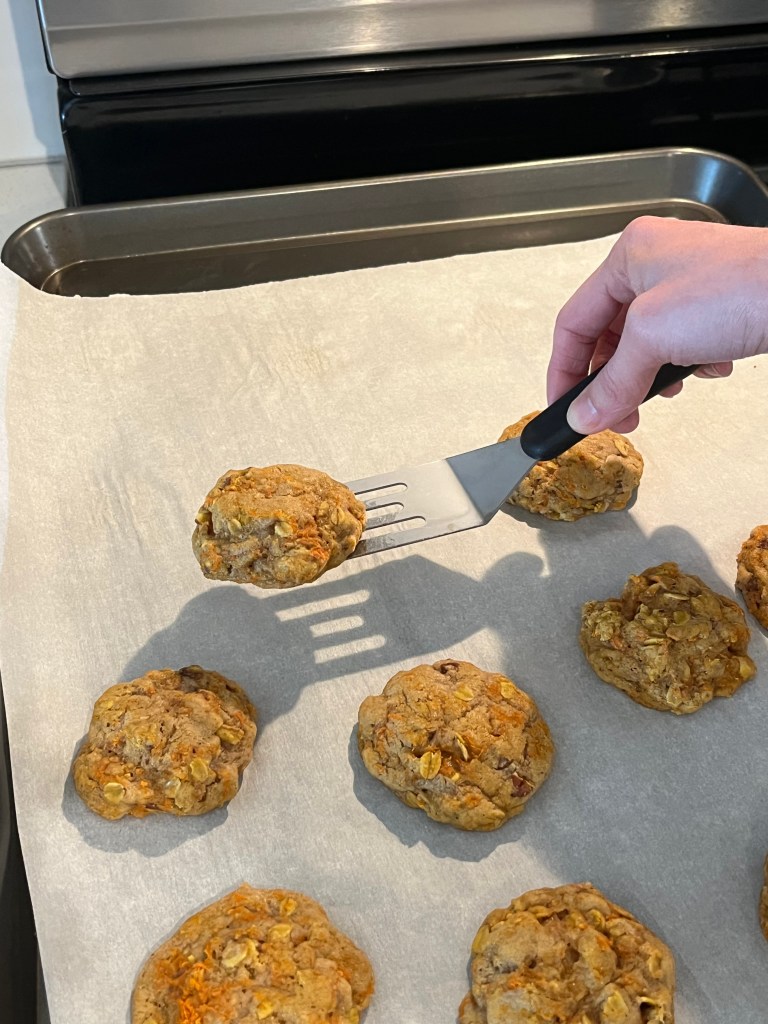
    Since my mother-in-law loves carrot cake, I decided to make carrot cake cookies with cream cheese frosting. They felt a little more casual and easier to eat than slicing cake, which worked perfectly for a mingling kind of night. (I unfortunately didn’t get a picture of the completed cookies, but they were delicious and we got multiple compliments. The food was definitely a win!)

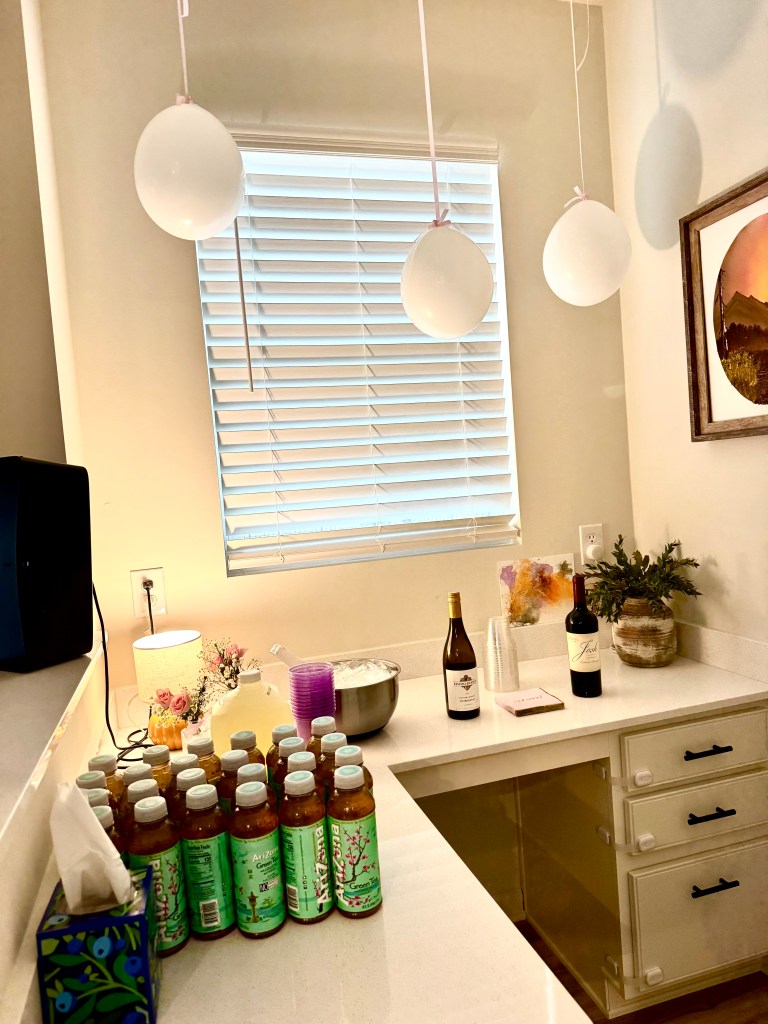
    We also set up a small drink station just off the kitchen with my mother-in-law’s favorite wines, lemonade, and one of her favorite teas. It worked surprisingly well and kept the kitchen from getting congested. People gathered around the island, chatting and laughing, and it felt warm and full in the best way.

    Hosting tip: Separating food, drinks, and seating naturally encourages movement and conversation.

    drink station

    Creating an Elegant Party Setup Without Overdecorating

    Some of the links in this post are affiliate links. I may earn a small commission if you make a purchase at no extra cost to you.

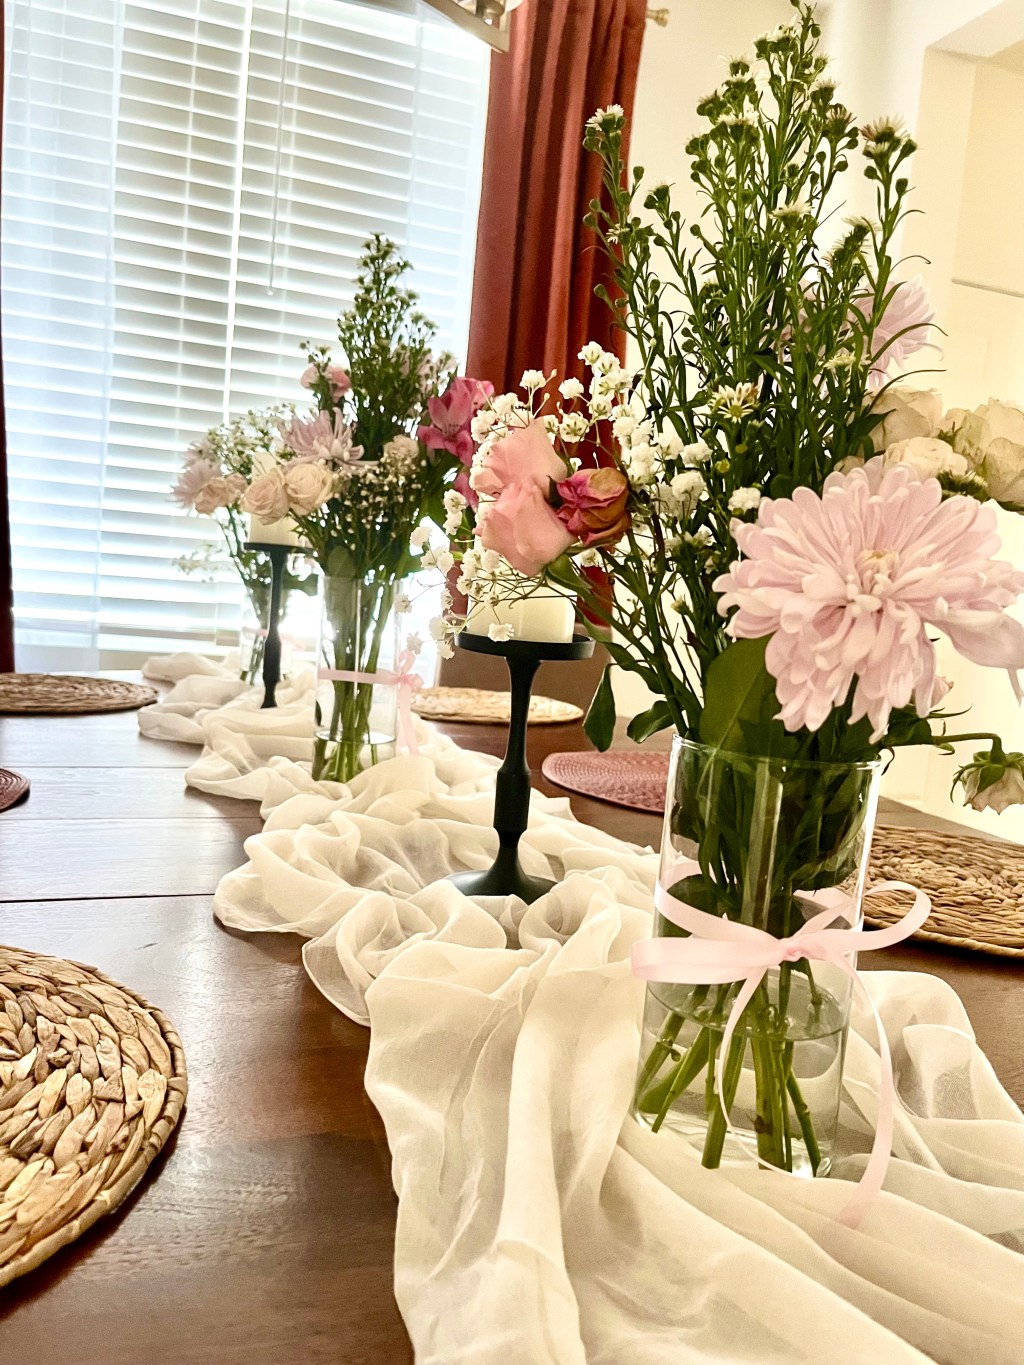
    I started setting up on Thursday night. First came the flowers. I had ordered a pack of bud vases from Amazon, and they were exactly the look I wanted. I filled them with roses, baby’s breath, and small white daisy-like flowers. They were wispy, soft, and elegant. I tucked them throughout the kitchen for subtle pops of pink.

    Hosting tip: Repeating one or two elements, like flowers or balloons, creates an elevated look without over-decorating.

    dining table decor

    I also made three larger floral arrangements using vases from our wedding and placed them on the dining room table. Honestly, the dining room was the star of the show. Our table has never looked more beautiful.

    Then came the balloons… which almost broke me.

    Balloon decor

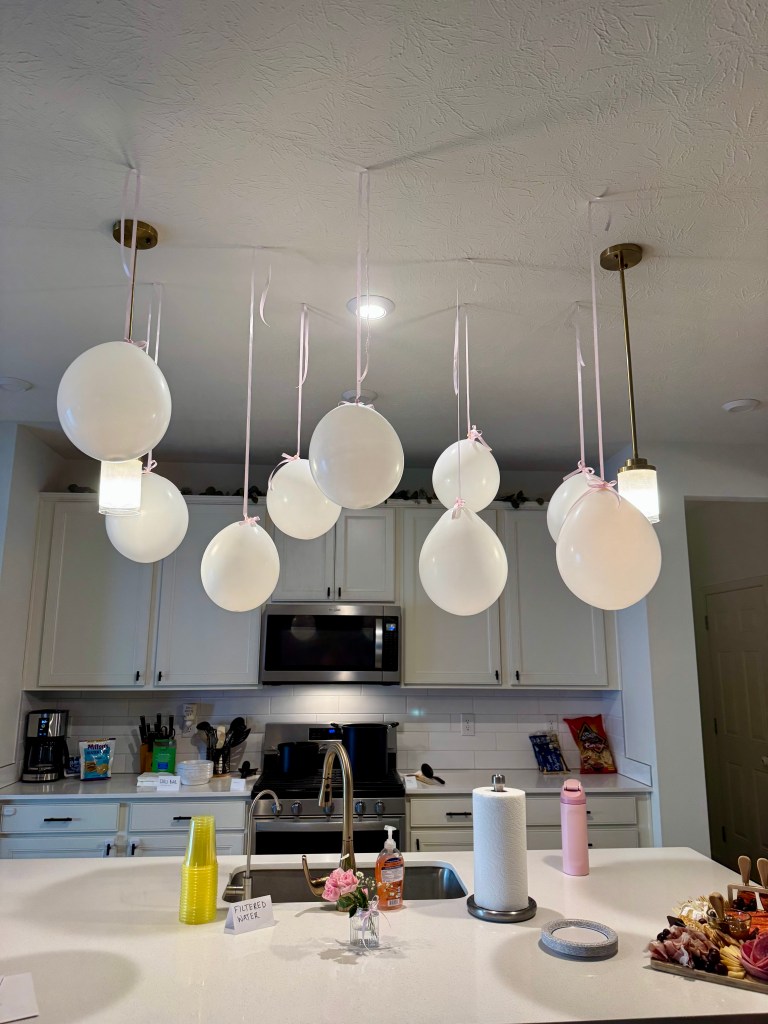
    I have the worst luck with balloon decorations. I tried a Pinterest “hack” that involved taping balloons directly to the ceiling. This was fake news. I hung twelve balloons, and only three survived through the night. So Friday morning, I regrouped and flipped the plan (literally). I turned the balloons upside down and taped the ribbon to the ceiling instead of the balloon itself. Genius. I saw that hack on Pinterest too, and it actually worked. One balloon popped and had to be replaced, but the ribbons stayed up all night and the effect felt simple and elegant, exactly what I was going for.

    Friday was all about cleaning and resetting the downstairs. Jake and I tackled the chaos while my parents came over to entertain our boys and help us move some rogue boxes that had been living in our dining room far too long. My mom also lent me her charcuterie board and helped me plan what to serve. Truly, charcuterie boards are the unsung heroes of hosting. They’re easy, flexible, and somehow always look like you put in way more effort than you actually did.

    Saturday was go time.

    Jake started cooking the chili around 12:30pm, so it could simmer for hours and let all the flavors meld together before the 4:30pm start time. We got so many compliments on our chili, and multiple people asked for the recipe.

    While the chili was cooking, I got to work frosting the cookies I had made the night before and setting them on my little cake stand I was using for displaying them.

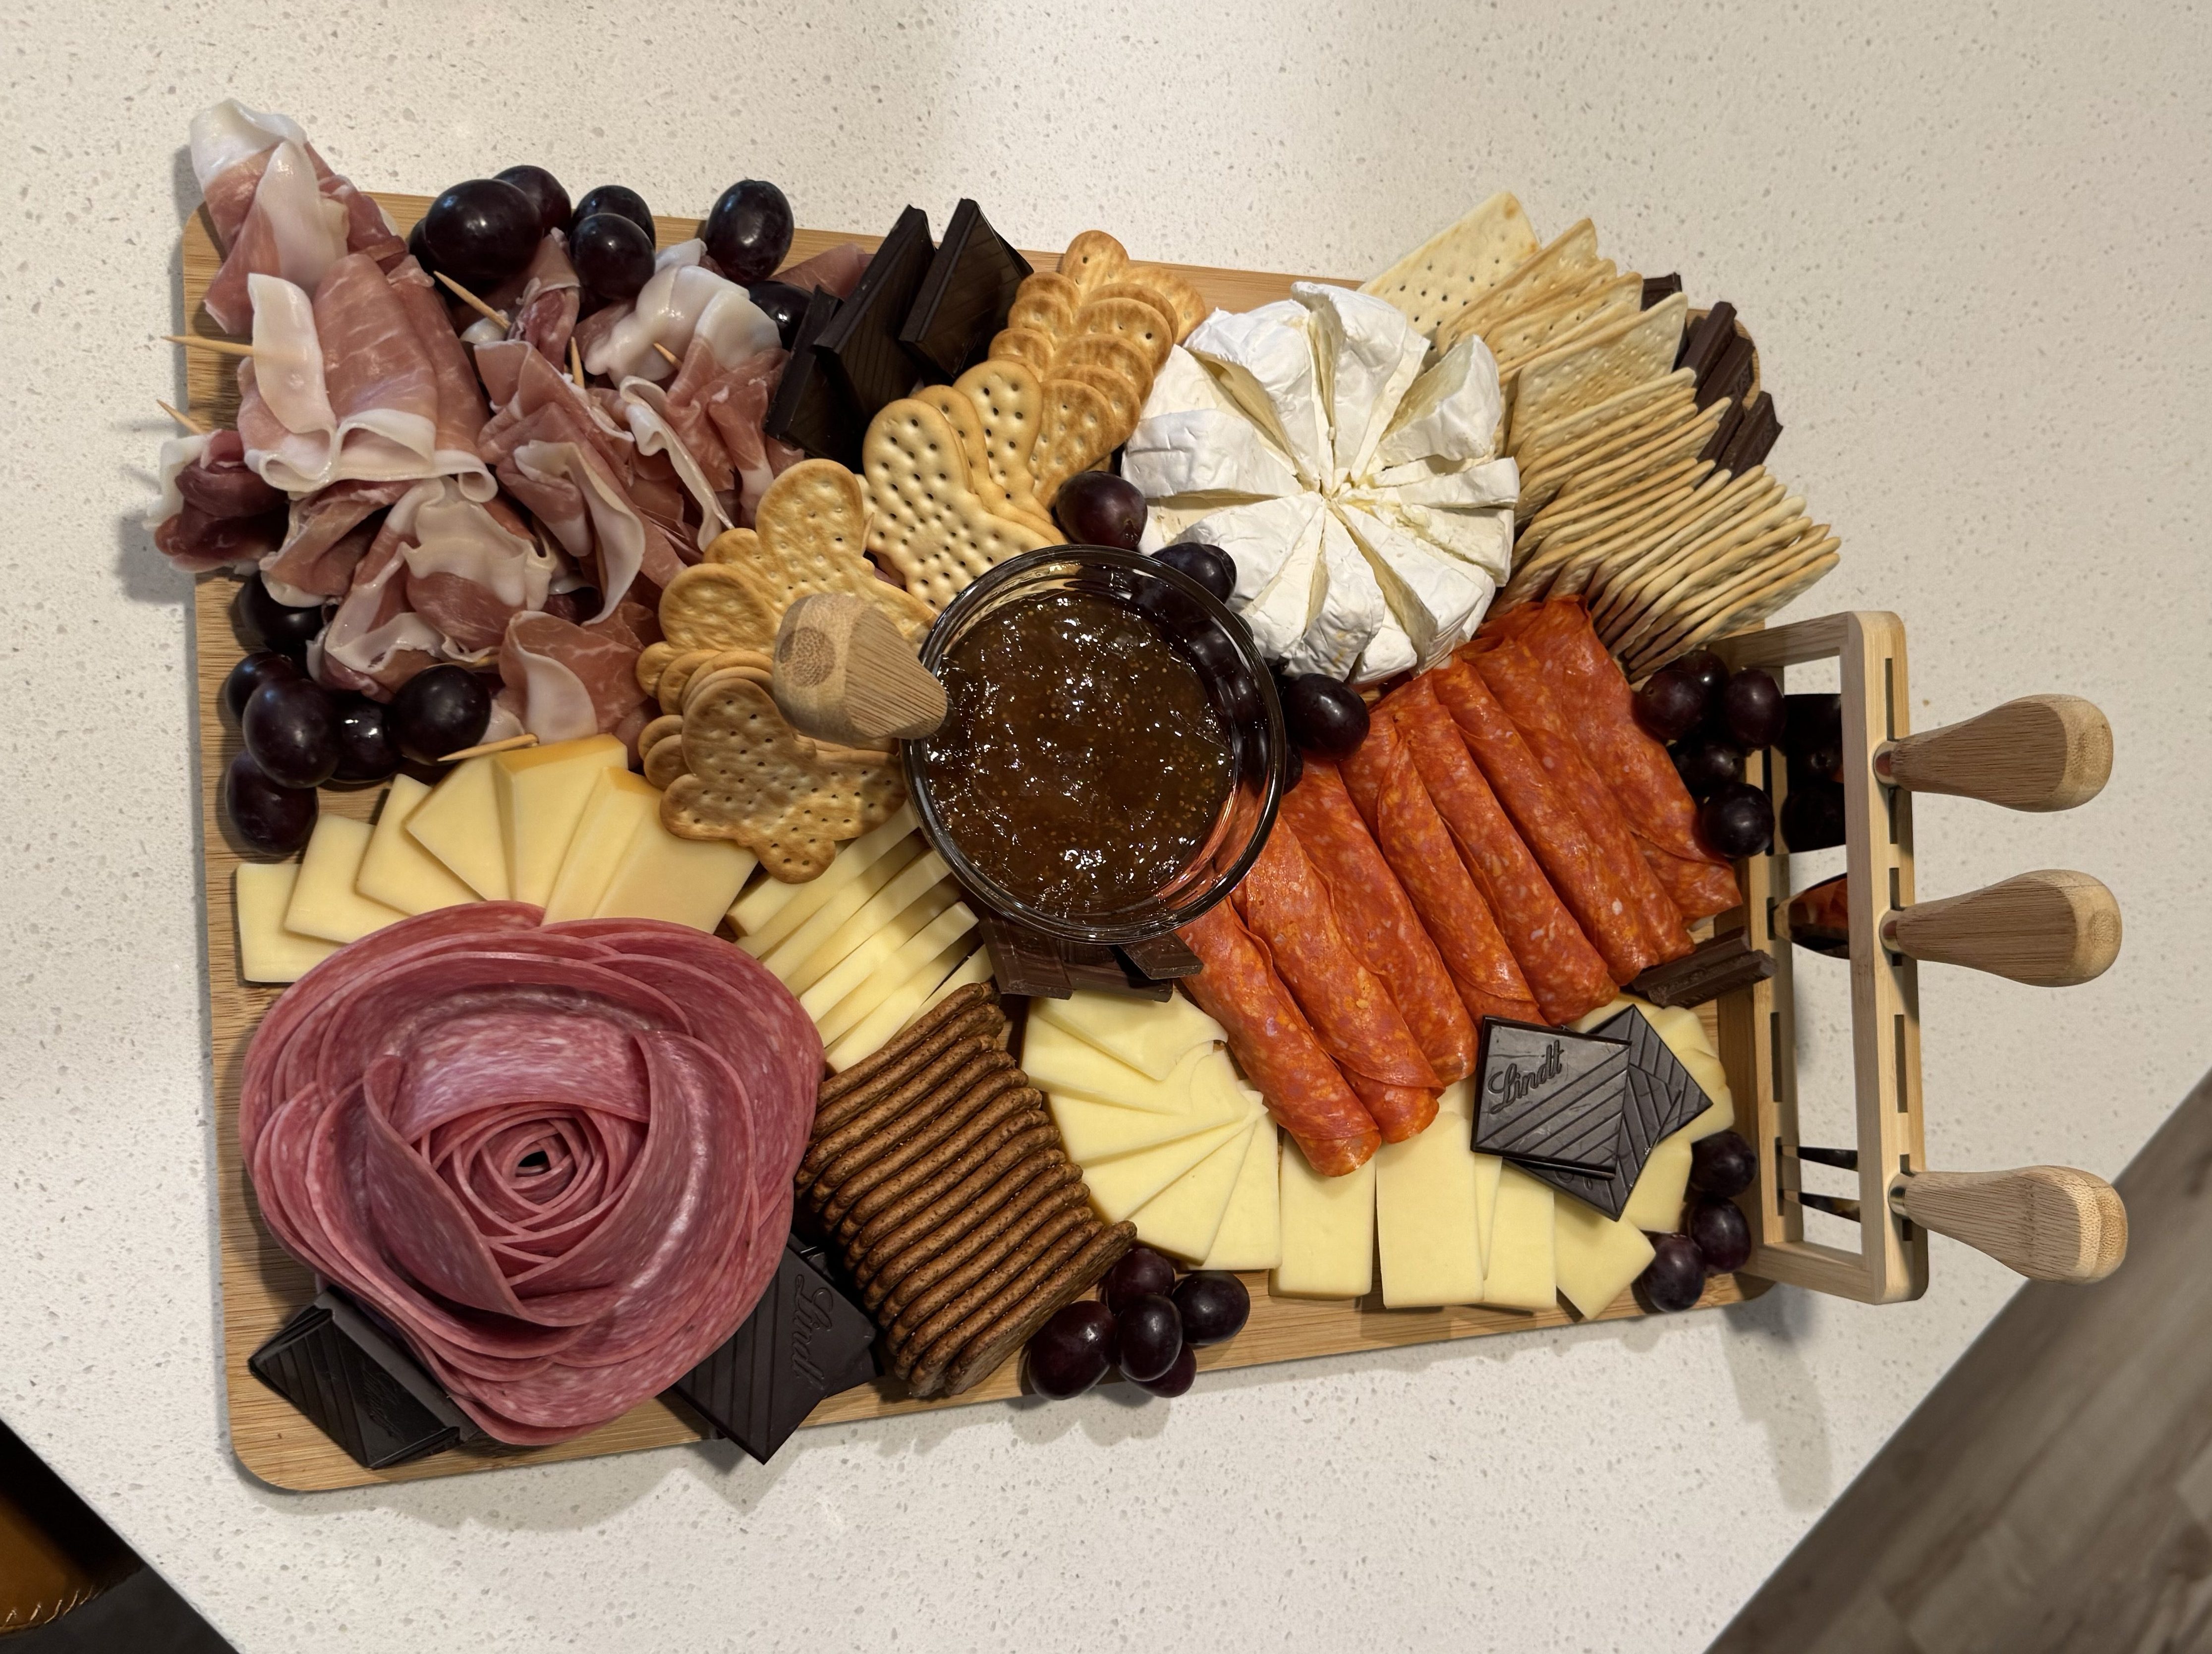
    A Cozy Charcuterie Board That Was Easy to Assemble

    Right before guests arrived, my mom helped me assemble the charcuterie board. We kept it classic: Genoa salami, pepperoni, prosciutto, brie, cheddar, mozzarella, grapes, fig jam, and chocolates. I set it out as guests started arriving, and once my mother-in-law walked in and the surprise was revealed, we invited everyone to eat.

    charcuterie board

    Later in the evening, once it felt like people were winding down from dinner, I brought out the cookies. The flow felt natural and unforced, which was exactly what I hoped for.

    Hosting tip: Waiting a bit before dessert helps the evening feel relaxed and gives guests something to look forward to.

    The only downside? I worked really hard on the dining room, and I was the only one who sat at the table. Womp womp. But honestly, that felt like a good sign. Everyone was mingling, connecting, and having a genuinely good time.

    Hosting as an Introvert: Letting Go of Perfection

    She was completely surprised and so happy to see her closest friends and family all together. I even made a playlist with her favorite songs and created a slideshow by scouring her Facebook for photos of her with the people she loves most. She deserves the world, and I’m just grateful we could give her a night that made her feel celebrated.

    This whole experience reminded me that it doesn’t take much to make someone feel special. It wasn’t effortless, but it also didn’t require perfection. What mattered most was bringing people together.

    Hosting doesn’t have to be elaborate to be meaningful. It just has to be thoughtful.

    So if you’re an introvert like me, and hosting feels intimidating, this is your sign. Plan the party. Light the candles. Serve the chili. People will remember how it felt far longer than they’ll remember the details.

    And that’s always worth it.

  • The baby blanket that almost was

    I was walking through meijer one day, perusing the craft section trying to find paint for a lamp revamp I planned on doing. When what to my wandering eyes should appear? A cake of yarn that claims it’s big enough to make a baby blanket. What?!!?

    As I admired the colors of the yarn, noting that they would pair beautifully with my cousins nursery, I bought it. Do I crochet? No. Do I knit? No. So I had to buy needles. I of course chose knitting, because I enjoy frustration.

    I buy the size needles it recommends. 2 straight needles. I head home and immediately started knitting. I dabbled in crochet and knitting when I was pregnant with my first. I think the only thing I crocheted was a winter hat that didn’t fit.

    Anyway, so I watch a YouTube video to “brush up on my skills” and get to work. When I tell you this was the hardest thing I’ve ever done, I am NOT exaggerating. First of all, I had to cast on, I believe 80 stitches. 80 STITCHES! On the needles. Ok…James?

    The stitches didn’t even fit. I was fighting the yarn the whole time trying to keep it from popping off. After further research, I learned there were circular needles, so of course I ordered a set of those AND a crochet needle set because what’s a spontaneous hobby without going overboard with the supplies?

    My 4ft blanket squished on a 2ft needle. How did I not know this wouldn’t work? (Peep my comfort movie: Twilight)

    So I restarted on the circular needles. This was much easier on my hands and wrists…until my fingertips started hurting from the pointy ends of the needles. My hands were so tired, I had to take a break.

    So much easier on my wrists

    I decided crocheting a quick little crossbody purse would be fun and I’d feel accomplished. A 4ft x 4ft baby blanket was a huge undertaking, so I figured I’d start another project. If you can believe it, I did finish the crossbody purse!

    I’ve never used it. It just sits in our entryway table, but I made it! With my own 2 hands!

    Anyway, so back to the blanket, which remember I’ve already restarted once. I finished the crossbody so fast, I decide I’m going to crochet the blanket instead.

    I started from the other end of the cake just to keep my knitted blanket intact in case I didn’t like the crocheted look.

    Okay, now mind you, I’m trying to finish this before my cousin’s baby shower. I restarted this blanket 2 DAYS before the baby shower.

    So I fly through this blanket. I’m allllmmmooosssttt to the end of the yarn that begins my knitted portion of the blanket, when all chaos breaks loose. My yarn is a giant knot. I can’t undo it. I end up pulling it apart about 6 inches from my needle. Now I have to tie the yarn back together. I have no faith that I can tie it strong enough. So now I have an almost finished baby blanket, that was not finished in time for the shower (the baby isn’t here yet so technically I still have time), I have my entire “knitted” portion of the blanket left…and I just quit. It’s been sitting in my closet for a month. I came so close, but it’s still not completed. Maybe one day. And that day has to be before March.

    Update: I just measured and it is currently sitting at about 3ft x 2ft. I have to at least add another foot before calling it complete. In a perfect world, I would add another 2 ft…

  • Best Robot Vacuum for Dog Owners: Why We Tried Again After a Disaster

    Best Robot Vacuum for Dog Owners: Why We Tried Again After a Disaster


    Some of the links in this post are affiliate links, which means I may earn a small commission at no extra cost to you. As an Amazon Associate, I earn from qualifying purchases.

    Well we tried life without a robot mop for about a month. We vacuumed almost everyday so we didn’t have crumbs but there’s nothing like waking up to freshly mopped floors every morning.

    We were scarred after a dog poop fiasco but now that there’s been enough time, and we had to manually mop the floors, we decided to buy another Roborock vacuum mop.

    I tried. I really did, but I can’t mop the floors every single day. I just don’t have the time or energy for all that.

    Our previous Roborock did his job, and he did it well. It wasn’t his fault our dog was having tummy issues.

    Our last robot lasted 1.5 years before “the incident” and while the robot still technically worked, no one would’ve wanted to get a secondhand poop vacuum, so we just tossed it.

    We definitely got our moneys worth out of that one and now we’ve decided to buy another. To us, buying a robot vacuum mop is more than worth it. The only thing our robot ever did wrong was live in a house with a sick dog.

    Enjoying this post so far? Subscribe for more product reviews, silly stories, and cozy projects.

    Some of the links in this post are affiliate links. I may earn a small commission if you make a purchase at no extra cost to you.

    The new robot patiently waiting to be used.

    We ended up going with the Roborock Qrevo Edge S5A. It’s basically the same one we had, but this one also has edge cleaning.

    Now, we do have some ground rules:

    #1 The robot only runs when we are awake so if there are any accidents, we can stop the robot and clean it up ourselves

    #2 We will keep up with the maintenance. While it is hands free cleaning, the tanks and trays need to be cleaned regularly so it doesn’t develop an odor and the machine is well taken care of overall

    Update: Just got word this robot cleans the tray! Which makes it even more maintenance free!

    That’s it. Those are the rules.

    What are your thoughts on robot vacuums? I never knew they made ones that mop too! They’re game changers.

  • The cute crossbody purse I made in 3 days as a beginner crocheter

    The cute crossbody purse I made in 3 days as a beginner crocheter


    Some of the links in this post are affiliate links, which means I may earn a small commission at no extra cost to you. As an Amazon Associate, I earn from qualifying purchases.

    In the midst of a baby blanket fiasco, I decided I’m going to start ANOTHER project. I rationalized with myself that I needed to “do something quick to feel accomplished.”

    You know what? I DID finish it quickly. (In my humble beginner crocheter opinion) And I DID feel accomplished.

    Some of the links in this post are affiliate links. I may earn a small commission if you make a purchase at no extra cost to you.

    I’ll link all the materials I used here, in case you’re intested:

    I obviously thought I was some kind of professional starting my second project, because I had a vision in my head of exactly what I wanted and I thought for a second I would just wing it.

    I started out knitting the bag, but it was taking FOREVER and I somehow kept adding stitches in each row.

    knitting mistake
    This was looking so pretty. I loved the texture, but I somehow kept adding stitches each time so it wasn’t straight on the edge.

    I came back to reality and realized I can piece this together using resources from people that actually know what they’re doing.

    So I start my research. I wanted a crossbody bag that was big enough to fit 2 diapers, a small pack of wipes, and other essentials like my phone, wallet and car keys. This was going to be my “mom bag.”

    I found a tutorial on youtube that was exactly what I was looking for. It was for a book sleeve, but I just measured my toddlers pull up so I knew what size I needed.

    As you can see, I switched to my crocket hooks, because my hands just cannot grasp the concept of knitting. This was a great decision, because I started flying through this bag!

    progress photo

    Here is the tutorial I used in case you’re curious and want to try it out!

    I finished the main portion of the bag and realized…this tutorial is for a book sleeve, not a purse. So then I was brainstorming how do I crochet a strap??

    finished body of the purse
    I finished the main portion in our closet because I needed light but didn’t want to wake our baby.

    Well, I obviously got cocky because I just started crocheting a strap and measured the chain against my body. Newbie mistake. Double crochet makes the strap a little longer, so it unfortunately ended up being an awkward length.

    I used it for one day and realized I needed to add a lining because the yarn was stretching with all of my stuff in it.

    finished crochet purse on my body

    So I called my mom up and asked for her sewing kit. I had leftover fabric from my Goodwill Bear Lamp flip so I was able to get started on a lining immediately!

    lining of purse

    This is my first ever crochet project that I completed. I love the color of yarn I chose. I love the way it looks sitting on our entryway table…but I honestly haven’t used it since I completed it.

    I’ll give it another go soon and see how it works out. I think I’m not the biggest fan of where it sits on me. The strap has stretched even more from when I didn’t have the lining.

    Finished crochet purse

    Either way, I’m proud of myself for completing it!

  • Postpartum Fitness Fridays Week 7: Showing up for myself

    Starting the week with an early morning Sunday workout was great. I planned a surprise party for my mother-in-law the Saturday night before, and if I wasn’t meeting a friend at this class, you already know I would’ve canceled!

    But I didn’t. I set my alarm. I woke up. I showed up.

    If I’m being honest, I don’t think I’ll go again next Sunday. My friend will be out-of-state, and it was kind of a lot to workout 2 days in a row.

    I didn’t give myself any sort of break. Anyone who doesn’t practice yoga thinks that it is easy. I had the same bias.

    Listen to me and listen close. YOGA WORKOUTS ARE ONE OF MY HARDEST WORKOUTS EACH WEEK.

    The 2 yoga classes I took this week were both heated. They were both more advanced. I felt behind the whole time, but I got such a good workout in.

    I focused on my breath and movement. I made sure I was getting the most out of the class as I possibly could. And trust me. I got it.

    I ended the week the way I started with my bestie: solidcore. Somehow, the times worked out that I was working the same muscle groups, but they had different coaches so it wasn’t the same workout twice.

    Both coaches were pro coaches which I highly highly highly recommend taking. The flow of these made so much sense to my body and both were great with the instructions.

    I noticed the Sunday coach was very hands-on correction, and the Friday evening coach was more verbal.

    I ended the week feeling strong but sore. I’m noticing the muscles in my arms and shoulders. I’m liking what I see. No one around me has mentioned me looking different, but I see it and that’s all that matters.

    Workouts I completed:

    Sunday: solidcore signature50 hamstrings and triceps

    Monday: Yoga Sculpt & Flow

    Wednesday: Yoga Power Flow

    Friday: solidcore Signature50 hamstrings and arm wrap

  • Goodwill Bear Lamp Flip: Cozy Nursery Decor on a Budget

    Goodwill Bear Lamp Flip: Cozy Nursery Decor on a Budget

    I’m finding a new passion for making things with my hands. When I went thrifting with my cousin and came across this teddy bear lamp at Goodwill, I immediately started brainstorming how to flip it to fit perfectly into her nursery.

    We went on a mission to look for teddy bear-themed decor, so when I saw this lamp, I knew she had to have it. I double checked with her to make sure she liked the lamp itself, so when she gave me the go-ahead, it was officially mine.

    A Cozy Goodwill Lamp Makeover for a Nursery

    The lamp was only $5, and I found a lamp shade for $1.50!

    Love cozy diy projects and goodwill finds? Subscribe to stay in the loop and never miss a post!

    This Goodwill lamp makeover took me a few weeks to finish, mostly because I worked on it during nap time, late nights, and at one point by locking myself in a room just to finish painting the blocks. Life of a mom, am I right?

    I stuck with a traditional teddy bear shade of tan because I felt like it would pair best with the blues and green I chose for the rest of the lamp. I wanted it to feel cozy, warm, and timeless in her nursery.

    I really wish I had a before photo of the lampshade. It started out as a dingy white, and I meticulously glued each panel of fabric in place, along with the trim separating each section. When I reached the bottom of the shade, it felt like it needed a little extra something.

    My cousin had shared her Pinterest board with me, and I noticed a lot of scalloped details throughout her nursery inspiration. Naturally, I went on a hunt and found the prettiest scalloped crochet trim at Michaels. It matched the blue fabric perfectly. As a boy mom myself, I also love sneaking in slightly “girly” touches here and there just to keep everyone on their toes.

    I absolutely love how this thrifted bear lamp makeover turned out. It’s a one-of-a-kind, cozy nursery lamp and such a special gift to give. There’s something so meaningful about creating something with your own hands and personalizing it just for someone you love.

    What was the last gift you gave that you made with your own 2 hands? (whether from scratch or a good zhuzh)

  • Postpartum Fitness Fridays: Week 6 – Strength is showing up in quiet ways

    How I’m Feeling This Week

    Week 6 felt less about pushing harder and more about noticing changes. Not dramatic ones. Not flashy ones. But the kind that make you pause mid-workout and think, okay, something is different.

    I’m still tired. Sleep is still unpredictable. Life with two little kids is still loud and full. My body is starting to respond in ways that feel encouraging instead of frustrating and that’s a big mental shift for me.

    The Workouts I Did

    Tuesday — [ solidcore ] Signature50 (Inner Thighs & Arms)

    This was a 7am class, which meant waking up at 620am… after a rough night. My toddler ran into the baby’s room in the middle of the night yelling for Dada, which fully woke the baby. I was up with him for two hours trying to get him back down.

    I was exhausted. Cancelling would have made perfect sense.

    But I went anyway. I made it on time. I took the class. And I was home, showered, and ready for the day before my boys even woke up. That feeling of accomplishment carried me through the entire morning.

    Not every workout feels good physically but some feel really good mentally.

    Thursday — YogaSix Signature Hot

    I’ve taken this class before, and I distinctly remember it feeling much harder. This time? I didn’t sweat nearly as much, my balance felt more stable, and I actually left class feeling stronger than when I walked in.

    It was one of those moments where you don’t realize progress is happening until it’s already there. Six weeks ago, this class felt overwhelming. This week, it felt doable.

    Sunday — [ solidcore ] Hamstrings & Triceps

    I took this class with a friend, which always makes things more fun especially when you’re suffering on the machine together. There’s something about shared struggle that makes a hard class feel lighter.

    Total workouts this week: 3 classes

    Goal for next week: 3 classes

    Nothing fancy. Just consistency.

    Pelvic Floor & Core Check-In

    This week felt solid.

    During bicycles, I lowered my legs almost to the ground which is something I haven’t felt comfortable doing postpartum until now. I went slower than everyone else and focused on keeping my lower back pressed into the floor.

    It didn’t look impressive. It didn’t feel rushed. It felt controlled and that matters so much more right now.

    Postpartum core work has taught me that slower and intentional usually wins.

    A Real Moment From This Week

    I did not want to go to an early morning class on Christmas Eve. I talked it through with Jake, and since his gym was closed, he encouraged me to cancel.

    Waking up at 5:30am is hard especially when you’re dealing with baby sleep issues. Some days, rest really is the better choice.

    This week reminded me that listening to your body sometimes means moving and sometimes means not.

    A Small Win I Don’t Want to Forget

    I did a home workout on Christmas Eve before family came over.

    I took that time for myself and my oldest came into the room after his nap, climbed onto the bed, and just watched me. No interruptions. No chaos. Just quiet curiosity.

    It felt like a small but meaningful moment: showing my kids that movement is part of life, not something I have to disappear to do.

    What I’m Working On Next Week

    Right now, I’m trying to figure out what earlier workouts look like as we work toward better schedules for the kids.

    Do I wake up and work out before Jake?

    Do I sleep a little longer and work out on his off days but still early enough to be home and showered before he leaves?

    No decisions yet. Just awareness and flexibility.

    Do you set New Year’s resolutions?

    Mine is to work out more, and technically, I started a month early. No regrets. This season has taught me that starting imperfectly still counts.

    Thanks for following along. See you next Friday.

  • The “Incident” That Led Us to Buying a Dyson Detect (Robot Vacuum Disaster)

    The “Incident” That Led Us to Buying a Dyson Detect (Robot Vacuum Disaster)


    Some of the links in this post are affiliate links, which means I may earn a small commission at no extra cost to you. As an Amazon Associate, I earn from qualifying purchases.

    I woke one Friday morning feeling groggy. I made my way downstairs to find Jake cooking breakfast and making coffee.

    Just as I was about to sit down at the table, Jake turned to look at me and I immediately knew something was wrong.

    “What??” I asked him.

    “One of the dogs pooped last night and the robot smeared it.”

    DUN DUN DUN.

    If you like honest home stories, real-life messes, and mom-approved product finds, you can subscribe here so you don’t miss future posts.

    The Robot Vacuum Incident No Dog Owner Wants

    Our worst fear with the robot vacuum mop officially came true.

    There was dog poop smeared all over the main living area. It was mostly concentrated to our dining room rug, but that’s the first room it cleans, which meant the robot had just vacuumed and mopped poopy water all over the hard floors.

    It took me eight hours to clean and disinfect all the carpets and mop all the floors. I tried to clean the robot, but with each piece I took apart, I gagged more and more thinking about cleaning all the tubing at the hub since the poop water would’ve had to make it back to the dirty water tank.

    Finally when Jake got off work, I asked him what he thinks. He agreed. Toss it. Throw it away. Get the poopy vacuum out of this house!

    Some of the links in this post are affiliate links. I may earn a small commission if you make a purchase at no extra cost to you.

    Why We Replaced Our Robot Vacuum With a Dyson Detect

    At that point, I just wanted a vacuum I could trust around dogs, kids, and real-life messes. That’s what pushed us toward the Dyson V15 Detect and honestly, I wish we had switched sooner.

    Here are my thoughts:

    Why we chose the Dyson V15 Detect:

    • powerful enough for dog hair + everyday crumbs
    • cordless (no robot, no cords, no scheduling stress)
    • shows hidden dirt with the detect light
    • works especially well on hard floors
    • easy to empty (no… tubing 🤢)

    (SPOILER ALERT: IM OBSESSED)

    The dust canister is massive, which means I’m not emptying it mid-clean which is something that matters a lot when you’re vacuuming daily with dogs and kids.

    Vacuuming the whole downstairs feels like a workout since it’s decently heavy, but I think it weighs so much from the battery and size of the dust canister. I don’t really mind it though, it feels sturdy and powerful.

    Literally vacuuming in the pitch black. This picture doesn’t do the light justice. It’s addicting to see the crumbs and then see them disappear after vacuuming!

    Jake and I are both obsessed with vacuuming in the pitch black because it shows every little dust particle. It’s become a little game of how much crumbs can we pick up and how much cleaner does the floor look! It’s crazy how crumb-y and dirty a floor gets in just a few hours with 2 dogs, a toddler, and a crawling baby.

    I love the ease of just walking room by room without worrying about plugging in the cord. When not in use, the vacuum sits in a charging home on the wall in our laundry room so whenever we need it, it’s always charged. The battery lasts the entire downstairs, so I’m not rushing to finish before it dies or stopping halfway through a mess.

    Some of the links in this post are affiliate links. I may earn a small commission if you make a purchase at no extra cost to you.

    Stick Vacuum vs Corded Vacuum: My Honest Take

    I will say, it’s more for hard floors versus carpets. I still prefer our Shark vacuum for the area rugs and upstairs carpets.

    That said, I highly highly highly recommend this Dyson vacuum. I’m addicted to cleaning because of the detect light.

    Who I Think the Dyson V15 Detect Is (and Isn’t) For

    This vacuum is great if you:

    • have dogs or shedding pets
    • mostly hard floors
    • want something quick for daily messes
    • don’t want to deal with cords or robot scheduling

    It might not be for you if:

    • your home is mostly carpet
    • you want one vacuum to deep-clean thick rugs
    • you prefer something lightweight above all else

    For us, it’s 100% worth it.

    We bought ours refurbished directly from Dyson to save money, and it looked brand new straight out of the box. No issues so far.

    You can buy the Dyson V15 Detect directly from the Dyson site like we did or they’re sold on Amazon if that’s your preferred shopping spot.

    So now I’m curious, what are your thoughts on stick vs corded vacuums?

    I really think there’s a time and place for both. If your home is mostly carpet, a corded vacuum still wins. But if you’ve got mostly hard floors? A stick vacuum is an absolute game changer.

  • Postpartum Fitness Fridays: Week 5

    How I’m Feeling This Week

    I feel like I’ve been saying this over and over, but I feel so strong. I also just feel good. I feel good. I look good. I’m liking the changes I’m seeing in my mood and my body. They say other people start to notice around week 6 of working out so we’ll see if anyone close to me notices my body changing.

    Workouts I did

    Monday: Y6 Sculpt & Flow

    This was a 6am class and I was one of the last people to show up. (I’m so bad at hearing my alarm. Luckily my husband tapped me.) I loved the playlist and the workout! It was so much fun. 

    Wednesday: Lagree at home lower body and core

    This was way harder than Solidcore. I don’t know if it’s because I was alone in a room instead of super load music and a coach yelling at me but I really struggled. 

    Also, to add context, when I was working out the first time after my first child, my husband bought me a lagree machine, which is very similar (in my opinion) to Svetlana. I’ve only used it a handful of time, but I was very grateful to have it this day. I see myself using it more often now that I’ve proven to myself I can just hop on and do it.

    Friday: [ solidcore ]  inner thighs and back

    The inner thighs workouts are killer. I’m feeling muscles I didn’t even know existed during these exercises. 

    Total workouts this week: 3 classes

    Goal for next week: 4 classes

    Pelvic Floor & Core Check-In

    During oblique exercises at Solidcore my hips were killing me. It’s not my hip bone. I feel like it’s a tendon or something. I noticed the day after my class, I was limping if I stepped a certain way because I’d get a super sharp pain. I only felt it on my knees though. If I moved up to my feet during the exercises, it didn’t bother my hips. 

    Real Moment from this Week

    I was so sore from the Sculpt & Flow class that I canceled my Tuesday morning barre class. Then I went ahead and just canceled Solidcore on Wednesday since it was Christmas Eve and I didn’t feel like going to a 6am class on Christmas Eve. 

    Small Win

    Even though I canceled 2 classes this week, I squeezed in time for a home workout on Christmas Eve before family came to visit!!

    What I’m Working on Next Week

    I’m going to work on preventing hip pain during obliques. It’s a problem when my obliques aren’t the obstacle in an exercise, but my hips are what are causing me to take lots of breaks. (Not that breaks are bad. It’s just annoying that the targeted area isn’t the one causing the fatigue.)

    Thanks for following along, see you next Friday!

    How was your Christmas/Holiday? 

  • The $50 Oak Table That Stole My Heart

    The $50 Oak Table That Stole My Heart

    I’ve been keeping an eye out for a small table to fit in our little café nook in the kitchen. Something with character, but not too big or too fancy.

    One Saturday morning, I was scrolling through Facebook Marketplace (as one does) when I spotted a solid oak table listed for just $50. The photos looked promising. A few scratches, sure, but nothing a tablecloth couldn’t hide. I didn’t think twice. My Papaw happened to be in town that weekend with his truck, so I sent my husband, my dad, and Papaw off on a little furniture rescue mission.

    When they brought it home, the table looked a bit rougher than the pictures had let on. The top had definitely seen better days, but I shrugged and said, “I’ll just clean it up, throw a tablecloth on, and call it a day.”

    My papaw wasn’t having it. He told me it would be super easy to refinish the top and that it would look like a brand-new table with just a little elbow grease. And when my Papaw tells me I can do something, I believe him.

    So the next day, I ran out to grab some sandpaper and got to work. Luckily, we already had an orbital sander, so I started with what the 60 grit sandpaper we had on hand to strip off the old finish and smooth out all the scratches and marks. That part actually went faster than I expected!

    Next, I switched to 180 grit and sanded by hand (since I forgot to buy the right kind for the sander — whoops). It wasn’t bad, though; the 60 grit had already done the hard part. I finished it off with 220 grit for a silky-smooth surface before cleaning the top with a little soap and water to get rid of the sawdust.

    After Staining!!

    For the stain, I used the same one from our mudroom bench project. It’s always satisfying to use what you already have, and it ended up being the perfect match. After two coats of stain, I ran to the hardware store for a top coat. I ended up doing three coats total (my first two were way too thin), and when it dried, I stood back and couldn’t believe how beautiful it turned out.

    I’ve never refinished furniture before, but this little $50 oak table turned into something really special. It fits perfectly in our kitchen’s café nook and looks like it was made for the space. I’m so glad my Papaw talked me into tackling it instead of hiding it under a tablecloth.

    I did “borrow” the chairs from our dining room for now, so I’m officially on the hunt for replacements but honestly, they look better here anyway.

    There’s just something about bringing an old piece back to life that makes a home feel extra cozy. If you love a good before-and-after, you can check out my DIY mudroom bench next — I used the same stain, and it turned out beautifully.